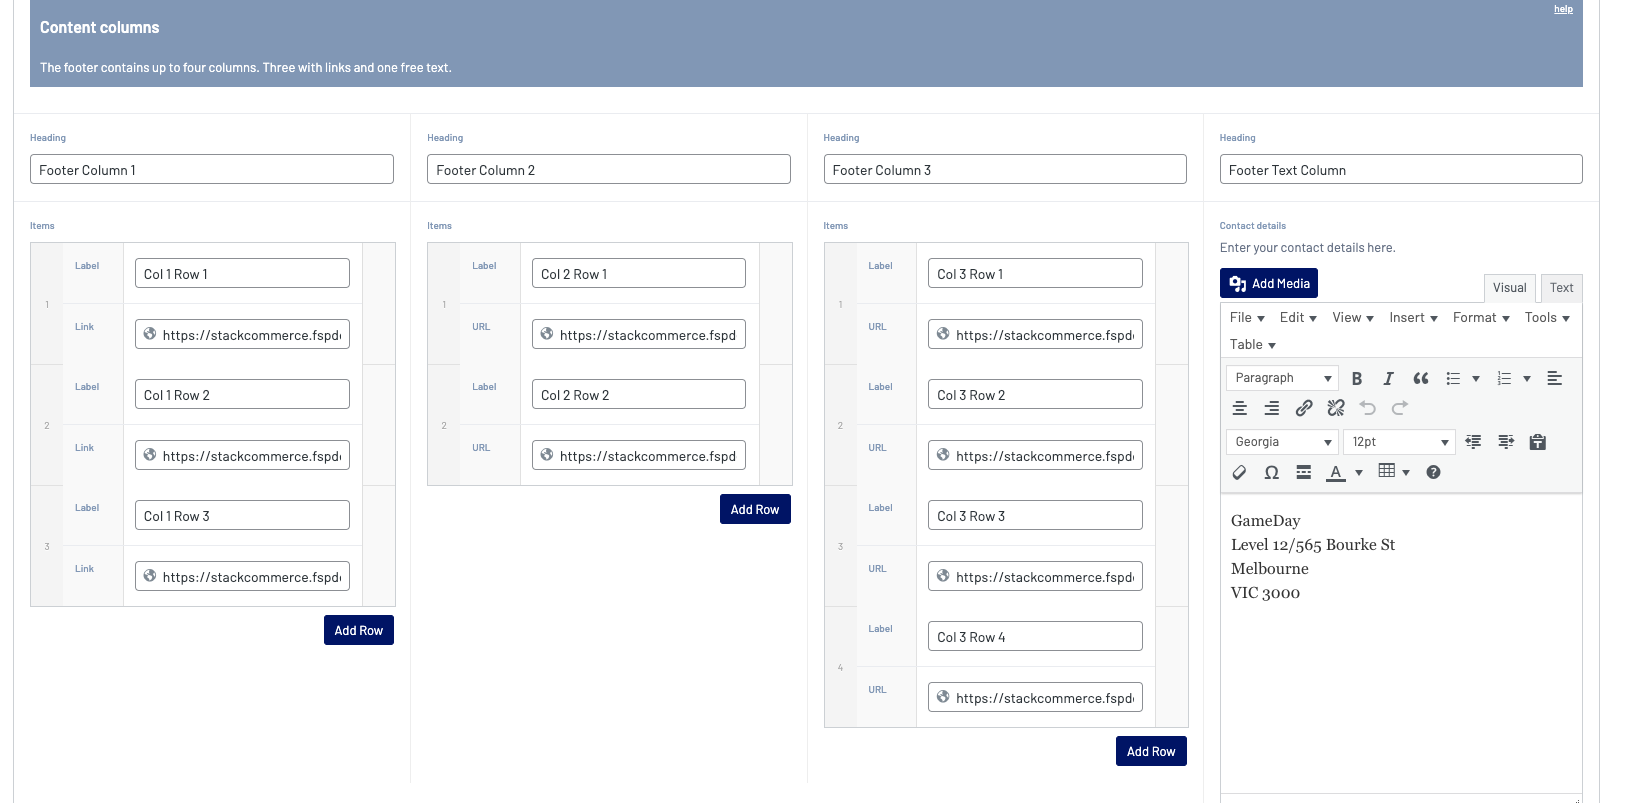
Footer Content Columns are the links that appear at the bottom of your website in the footer where you can link people to specific pages, quick links to other websites, etc.
In relation to the columns, you can have one column as free text (the right-most column) where you can free text - this is mainly used for 'contact us' details, while the other three columns are links to other websites, pages etc.
In relation to the content rows within each column you can have between one and eight rows - any more than eight links per column can make the footer display incorrectly.
1. Once you are logged into your website, scroll down to the FOOTER section. Select this section to expand it.
2. Scroll to CONTENT COLUMNS.

3. Input a heading for your first column and click ADD ROW to input your first link.
4. Input a heading for this first link and then add in the website link for this page, website etc.

5. Repeat for any other links you want to appear under this column.
NOTE: Maximum is 8 rows per column.
6. Repeat steps 3-5 for the next two columns.

To remove a row from a column, however over the row and click the minus icon against the row and click remove.

7. Input a heading and content for the last column.
This is the free text column where you can put anything you want in here - most organisations use this for CONTACT US information.

8. Once all columns have been completed, click PUBLISH at the top of the page to save these changes to your website.
EXAMPLE OF HOW THE CONTENT COLUMNS DISPLAY ON WEBSITE
